I recently set up a physical server and wanted to use it to host a Minecraft server. After staying up late researching, I succeeded and am sharing this guide in hopes that it helps everyone, especially Linux users without a public IP environment (like me).
Reference Websites
Installing and using Red Hat build of OpenJDK 21 on RHEL | Red Hat Product Documentation
SakuraFrp Launcher Installation / Usage Guide | SakuraFrp Documentation
Linux Terminal Server Hosting Tutorial ★ No Panel ★ Minecraft_bilibili
- From the Bilibili uploader
翱翔大使, which is the main source of ideas for this whole article.
Java Configuration
Running Minecraft requires the corresponding version of the Java environment; here I installed OpenJDK 21.
| |
If the server has multiple Java versions, you can use alternatives to switch versions.
| |
As shown below, we enter 2 and press Enter to switch to the required version.

Game Deployment
First, download the Minecraft server software from the following URL. Here I downloaded Banner (1.20.1), which supports Fabric.
[MohistMC](MohistMC - Home)


Once downloaded, you will get a file like banner-1.20.1-800-server.jar. Next, open your SSH client to operate on the server:
| |
Using the SFTP feature in your SSH client (or any other file transfer method), copy the game file banner-1.20.1-800-server.jar you just downloaded into the newly created /home/username/Minecraft folder.
Next, let’s write a startup script for the server.
| |
Fill in the following content, but note the purpose of each parameter:
-Xmxis the maximum allocated memory,-Xmsis the minimum allocated memory. I have 32GB of memory and allocated 6GB to the game (feel free to allocate more).banner-1.20.1-800-server.jaris the name of the game file you just downloaded.
| |
Press Ctrl + O to write, Enter to confirm, and Ctrl + X to exit.
Next, grant execution permissions to start.sh to avoid permission denied issues.
| |
Then install screen. Simply put, screen is a tool that helps users create independent sessions that can be resumed at any time.
| |
screen has the following common commands:
| |
Next, create a new screen to run the script.
| |
In the newly appeared session, run start.sh.
| |
Then everything should go smoothly. I didn’t encounter any errors here. Finally, it comes to ...EULA... asking us to agree to the EULA. Enter true and press Enter. After a short wait, the game server will run successfully on port 25565.
To leave this Minecraft screen, just press Ctrl+A+D.
For game rule changes (like ‘whether cracked players are allowed to join’), you need to modify the contents of server.properties.
Regarding connection: If it’s a cloud server, map the port in the administration panel, then connect to domain:port in your Minecraft client.
However, for a physical server like mine, or a Linux device, or a personal PC without a public IP, we need to proceed with Intranet Penetration.
Intranet Penetration
Here I am using SakuraFrp, which is well-known and reliable in the Minecraft community, for intranet penetration. Other tools are mostly similar.
Docker
SakuraFrp on Linux runs on Docker, so let’s deploy Docker first. The operations entirely follow the official documentation.
| |
I encountered very slow installation speeds and download failures here. Running the command again solved the problem.
| |
After the installation is complete:
| |
| |
The run hello-world test above is very likely to fail. Let’s solve this issue by referring to the following two articles:
Failed or Timeout Running hello-world Image in Docker - Paul7777 - cnblogs
Combining the two above will eventually solve the problem. First, let’s configure the daemon file.
| |
Copy the following content into it:
- At the time of my testing (2025/3/19), the following mirrors are still working.
| |
Save + Exit. Next, restart docker, and execute the test once more.
| |
I successfully installed docker up to this point. If the test still fails, please check the content of daemon.json to see if there are missing or extra commas and brackets.
SakuraFrp
For deploying SakuraFrp on Linux, the official documentation provides a detailed solution.
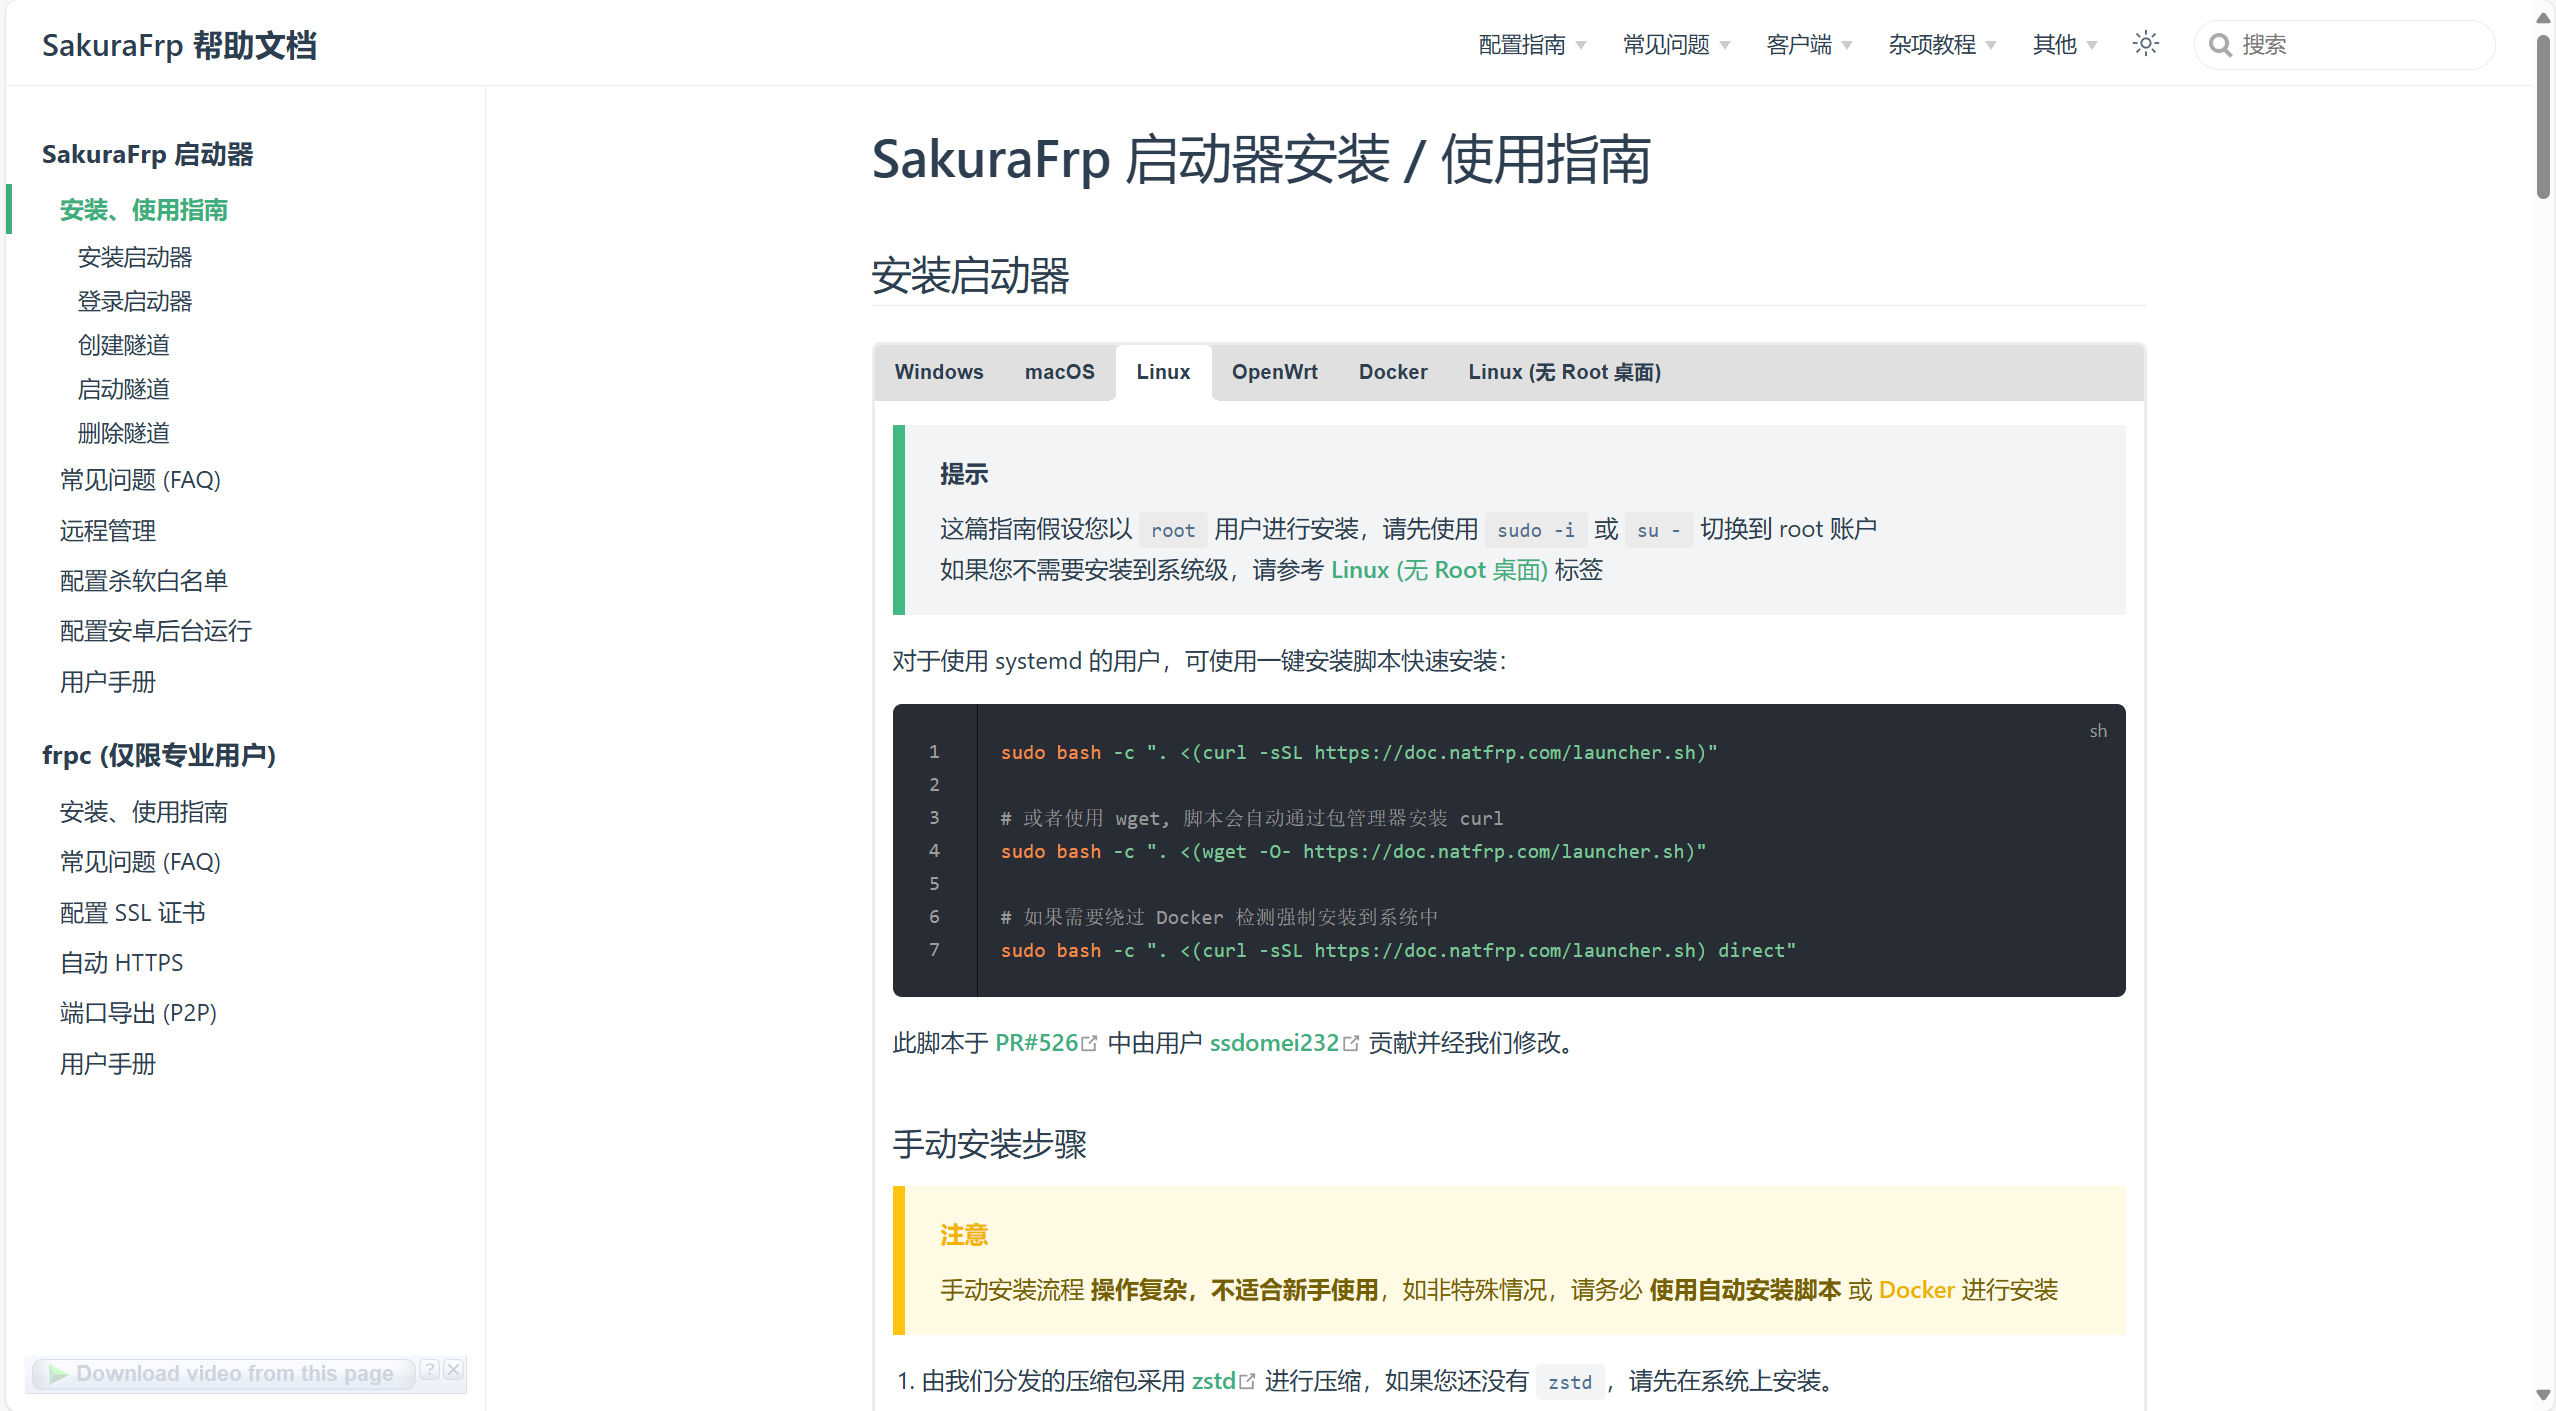
First, run the following command as an administrator in the terminal:
| |
After installation, it should automatically output logs and prompt you to fill in the access token. This (or the subsequent operations) can be found in the management panel on the SakuraFrp official website.

After logging in, you will be able to see its log files. Below are the common operations to start it and view logs:
| |
As shown below, we now need to physically operate the server.

Open a browser (Linux usually comes with Firefox) and access the URL after “Usage” to open the WebUI.
Then you will see there is nothing under “Tunnels”, only a plus sign. At this time, we enter the SakuraFrp management panel, find Tunnel List under Services, and create two new tunnels as shown below:
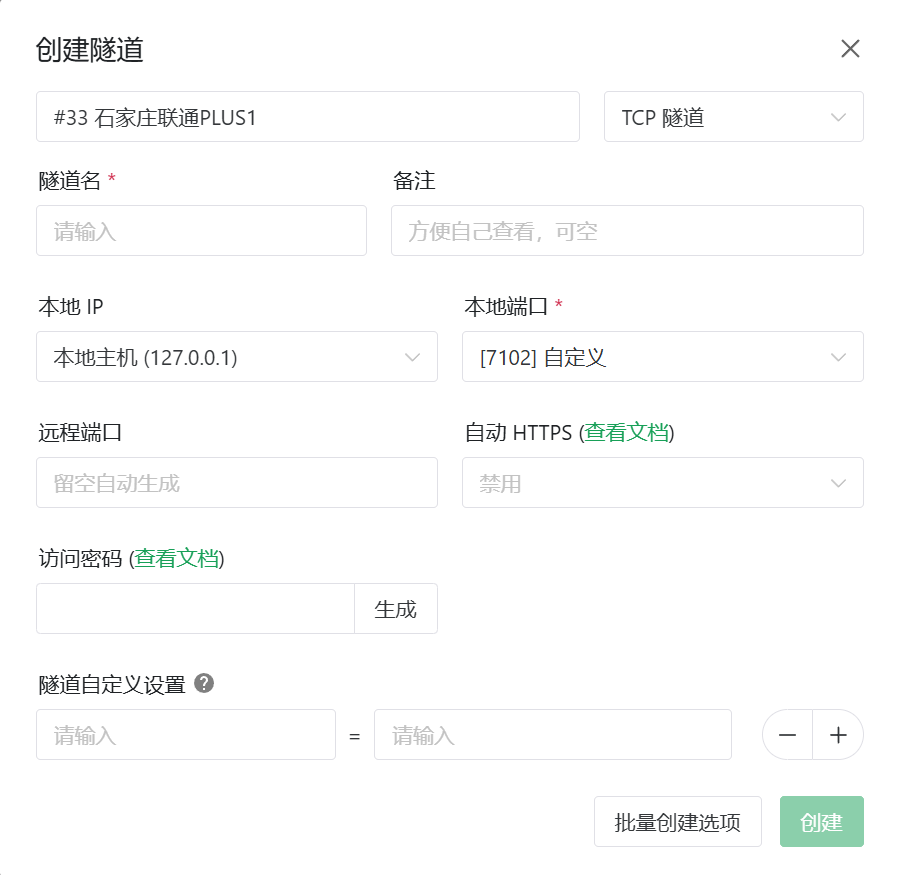

The first one with port 7102 is the WebUI for SakuraFrp on the server, intended for remote management.
The second one with port 25565 is for the Minecraft server.
Return to the WebUI interface and refresh, you will see the two tunnels just created. Double-click them respectively, and then go back to the terminal log interface.

The links in red characters as shown in the image are the remote access links for the WebUI and Minecraft. Just copy the Minecraft one into the game, and you can connect to it.
Conclusion
We are done! (A screenshot of my server’s spawn point >w<)